
Build a simple gravity-fed timer chute: here’s how to make a diy automatic dog feeder with cardboard.
If you want a low-cost feeder that actually works, you are in the right place. I’ll show you how to make a diy automatic dog feeder with cardboard using a gravity hopper, a timed gate, and a clean bowl path. I’ve built versions of this for my beagle foster, learned what fails, and tuned what lasts. Follow along for clear steps, smart tweaks, and safety tips that keep your dog’s meals on time.
What You’ll Build and How It Works
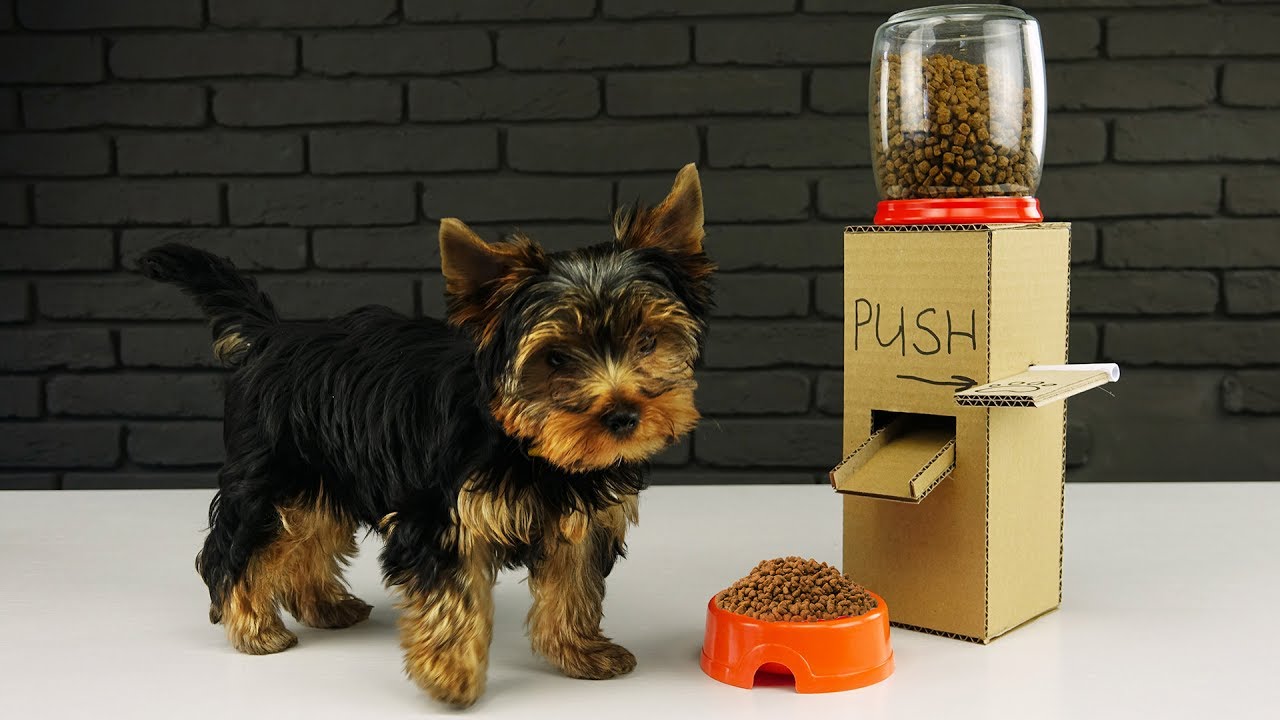
You will build a hopper that holds dry kibble, a chute that guides it, and a gate that opens on a schedule. Gravity moves the food. A simple timer or elastic-driven flap controls the release. The result is a consistent portion at set times.
This guide explains how to make a diy automatic dog feeder with cardboard that you can adjust, clean, and upgrade. It is great for small to medium dogs that eat dry kibble.
Tools and Materials Checklist
You can build this with common items. Pick sturdy, food-safe parts.
- Cardboard from a clean, unprinted box
- Food-safe bowl made of stainless steel
- Craft knife and spare blades
- Ruler, square, and pencil
- Hot glue sticks and gun or non-toxic PVA glue
- Masking tape or painter’s tape
- Wooden dowel or pencil for the flap axle
- Rubber bands or hair ties
- Binder clips or small magnets
- Small servo motor and micro timer or a simple plug-in outlet timer (optional)
- Sandpaper for smoothing edges
- Clear food-safe tape for sealing the chute
- Non-toxic water-based sealant for moisture protection
If you wonder how to make a diy automatic dog feeder with cardboard on a tight budget, start with manual parts first. You can add a timer and servo later.

Safety, Hygiene, and When Not to Use Cardboard
Cardboard is not ideal for wet food or outdoors. It works best indoors with dry kibble only. Keep the feeder off the floor to avoid spills and pests.
- Wash the bowl daily.
- Replace any soggy parts at once.
- Seal the chute so grease does not soak in.
- Supervise at first to ensure your dog does not chew it.
If your dog is a power chewer, consider plastic sheet, plywood, or a steel bowl mount. You can still use this plan to learn how to make a diy automatic dog feeder with cardboard, then swap in stronger panels later.

Step-by-Step: Build the Gravity Hopper
The hopper is a box with a sloped floor that aims kibble into a narrow throat. The throat feeds a gate, then drops food into the bowl.
- Sketch the plan. Draw a tall box about 10 inches wide, 14 inches tall, and 6 inches deep for small to medium dogs.
- Cut panels. Make the front with a window slot near the bottom. Make a back, two sides, a top, and a base.
- Make a sloped floor. Cut an inner panel that tilts down toward the front. Aim for a 30 to 40 degree angle so kibble flows.
- Form the throat. At the lowest point, leave a gap about 1 to 1.5 kibble heights tall and 3 to 4 inches wide.
- Build the chute. Add a short tunnel below the throat to guide food to the bowl, ending 2 inches above the bowl.
- Dry fit. Tape the parts, test with dry kibble, and watch the flow. Sand any snags and widen the throat if kibble bridges.
- Glue and seal. Glue the box, then seal chute seams with clear food-safe tape.
This is the core of how to make a diy automatic dog feeder with cardboard. Get the flow right before adding a gate.

Step-by-Step: Add a Timed Gate (Manual, Elastic, or Servo)
You will now control release with a flap. Start simple. Then upgrade.
Manual pull tab
- Cut a flap at the bottom of the throat. Mount it on a dowel across the chute.
- Add a pull tab from string or ribbon. Tie it to a binder clip that locks the flap shut.
- At meal time, pull, count the desired flow seconds, then close.
Elastic timer flap
- Mount the flap as above.
- Add two rubber bands that pull the flap open when released.
- Use a cheap plug-in timer to cut power to a small magnetic latch or to drop a binder clip. When the latch releases, bands open the flap. Place a stop so it opens only a little.
Servo and micro timer
- Attach a small servo to the flap axle with a horn.
- Use a simple programmable timer board or microcontroller. Set it to rotate the servo 15 to 30 degrees for a set time.
- Add a hard stop so the gate cannot over-rotate.
When I built my first version, I set the flap too wide. The bowl overflowed. A small opening works better. That is a key tip in how to make a diy automatic dog feeder with cardboard that feeds steady portions.

Calibrate Portion Size and Flow
Portion size is about time and gap. You must test with your kibble size.
- Weigh a test bowl. Tare the scale.
- Open the flap for 2 seconds. Weigh the food. Note the grams.
- Repeat three times and average.
- Adjust the gap or time until you hit your target grams.
If kibble bridges, add a small shaker. Tape a coin to the flap so it taps the chute when opening. This small trick often fixes clogs. This step is vital for how to make a diy automatic dog feeder with cardboard that is consistent.

Power and Timer Options (No-Code and Simple-Code)
You can avoid coding and still automate.
No-code options
- Use a plug-in outlet timer with a small DC latch that holds the flap shut.
- Use a battery-powered kitchen timer that releases a clip at set times.
Simple-code options
- A small servo with a micro timer can run for months on AA cells.
- Program two feed times per day and a short open window.
Ask yourself, can it fail safe? Yes. Set the flap to spring closed when power is off. That is good practice for how to make a diy automatic dog feeder with cardboard.

Weatherproofing and Durability Tips
Cardboard needs help to last.
- Brush on a thin coat of non-toxic water-based sealant. Let it cure fully.
- Add corner braces inside using extra cardboard layers.
- Tape every edge of the chute so oil does not soak in.
- Raise the feeder on small feet to avoid spills.
If you place it in a humid room, add silica gel packs in the hopper lid. This simple upgrade supports how to make a diy automatic dog feeder with cardboard that endures daily use.
Training Your Dog to Use the Feeder
Dogs learn fast when the device is clear and calm.
- Feed near your dog so it links the sound with food.
- Start with manual use for a few days. Then switch on the timer.
- If your dog paws at the gate, raise the bowl height or add a front guard.
People ask, will this make my dog anxious? No, if you pair the first uses with praise. This keeps how to make a diy automatic dog feeder with cardboard friendly and stress free.
Maintenance, Cleaning, and Troubleshooting
A little care goes a long way.
Cleaning
- Wash the bowl daily.
- Wipe the chute every week with a damp cloth. Dry it well.
Troubleshooting
- If kibble jams, smooth corners, add a steeper floor, or reduce the throat width.
- If the flap leaks, add a foam strip as a gasket.
- If the servo stalls, add a counterweight or reduce flap size.
I learned to replace rubber bands every two months. They stretch and change timing. Build that swap into your plan for how to make a diy automatic dog feeder with cardboard.
Budget, Sustainability, and Upgrades
This project is cheap and green.
- Cost can be under ten dollars if you go manual.
- Use clean scrap boxes and a metal bowl you already own.
- Upgrade panels to corrugated plastic for water resistance.
- Add a clear window to watch kibble levels.
- Add a simple tilt switch alarm to alert when the bowl is empty.
These steps make how to make a diy automatic dog feeder with cardboard both affordable and reliable. You can grow it as your needs change.
Frequently Asked Questions
Is cardboard safe for dog feeders?
Yes, for dry kibble indoors. Keep it clean, sealed, and out of reach from heavy chewers.
How many meals can it handle per day?
Two to four is common. You can add more events if your timer supports them.
Will it work with large kibble?
Yes, but widen the throat and set a bigger gap. Test and adjust the angle to prevent bridging.
Can I use wet food with this design?
No. Wet food soaks cardboard and grows bacteria. Use stainless steel or plastic for wet meals.
What if the flap sticks during feeding?
Reduce friction on the axle, add a small counterweight, and set a hard stop. Test with a week of dry runs before daily use.
Conclusion
You now have a clear plan to design, build, and tune a working feeder. You learned flow basics, gate control, timing, and care. You also saw where cardboard shines and where it does not.
Start with the simple hopper and a manual flap today. Add a timer this weekend. If you build it, share a photo and your tweaks. Subscribe for more hands-on pet builds and step-by-step guides.

4 Comments